Drawing of Birds on Tree for Kids
This project has been one of my personal favorites for a very long time. It was the first project I did that made me aware of how powerful collage and choice-based techniques are for children.
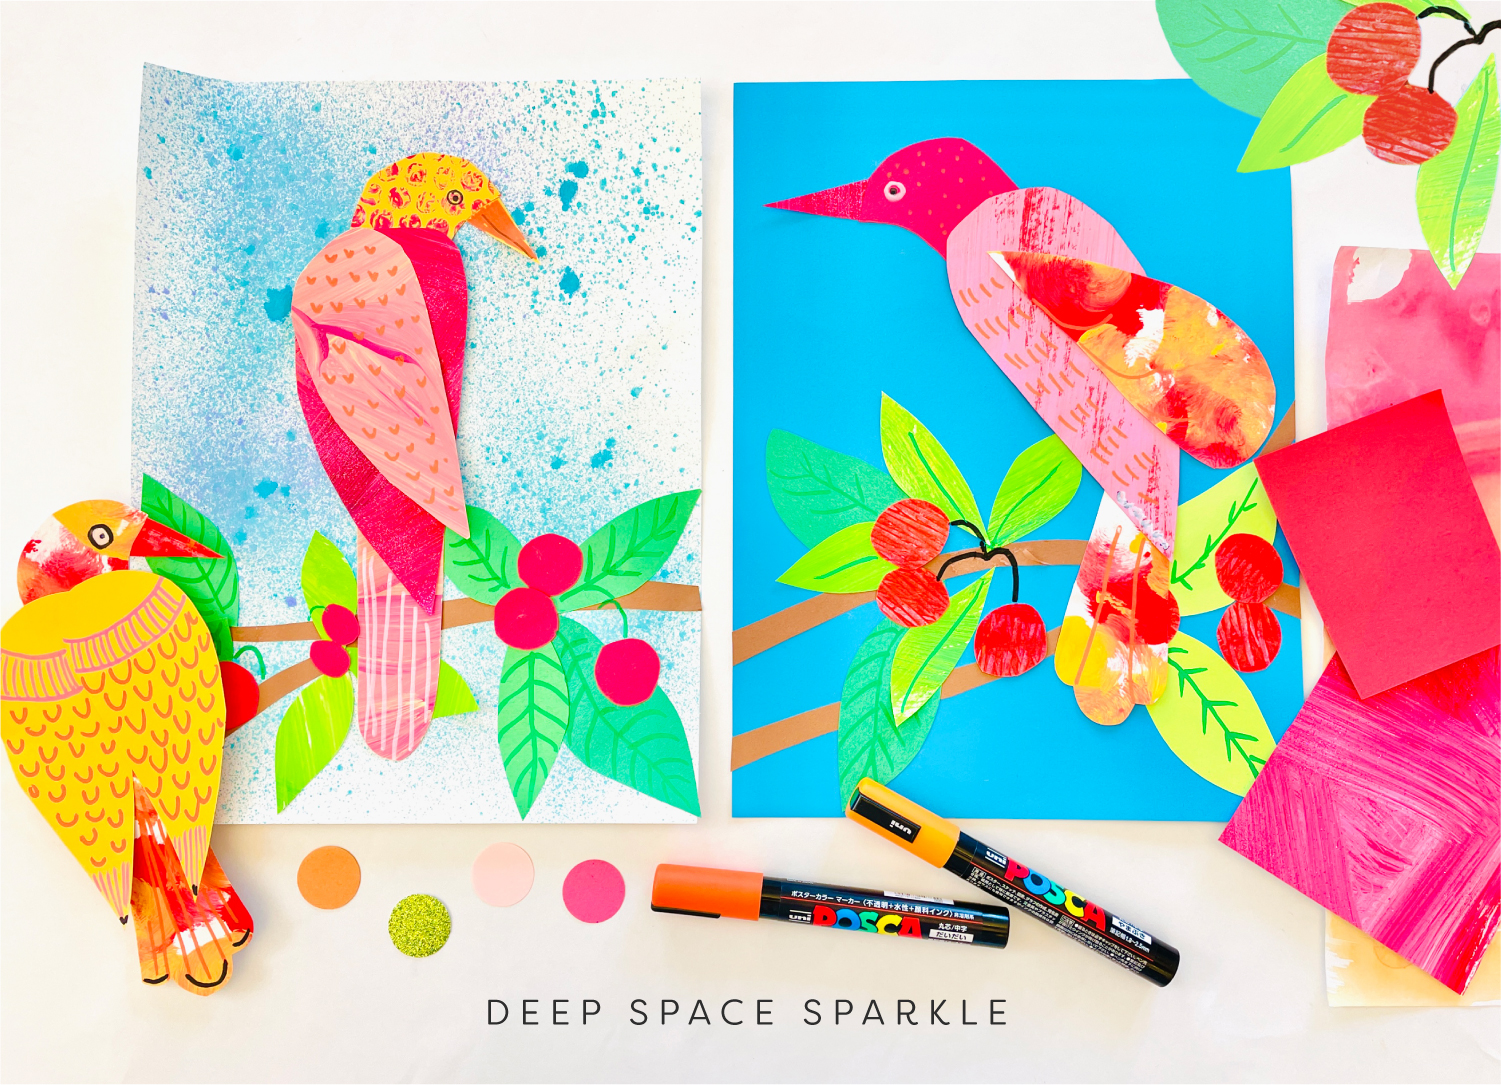
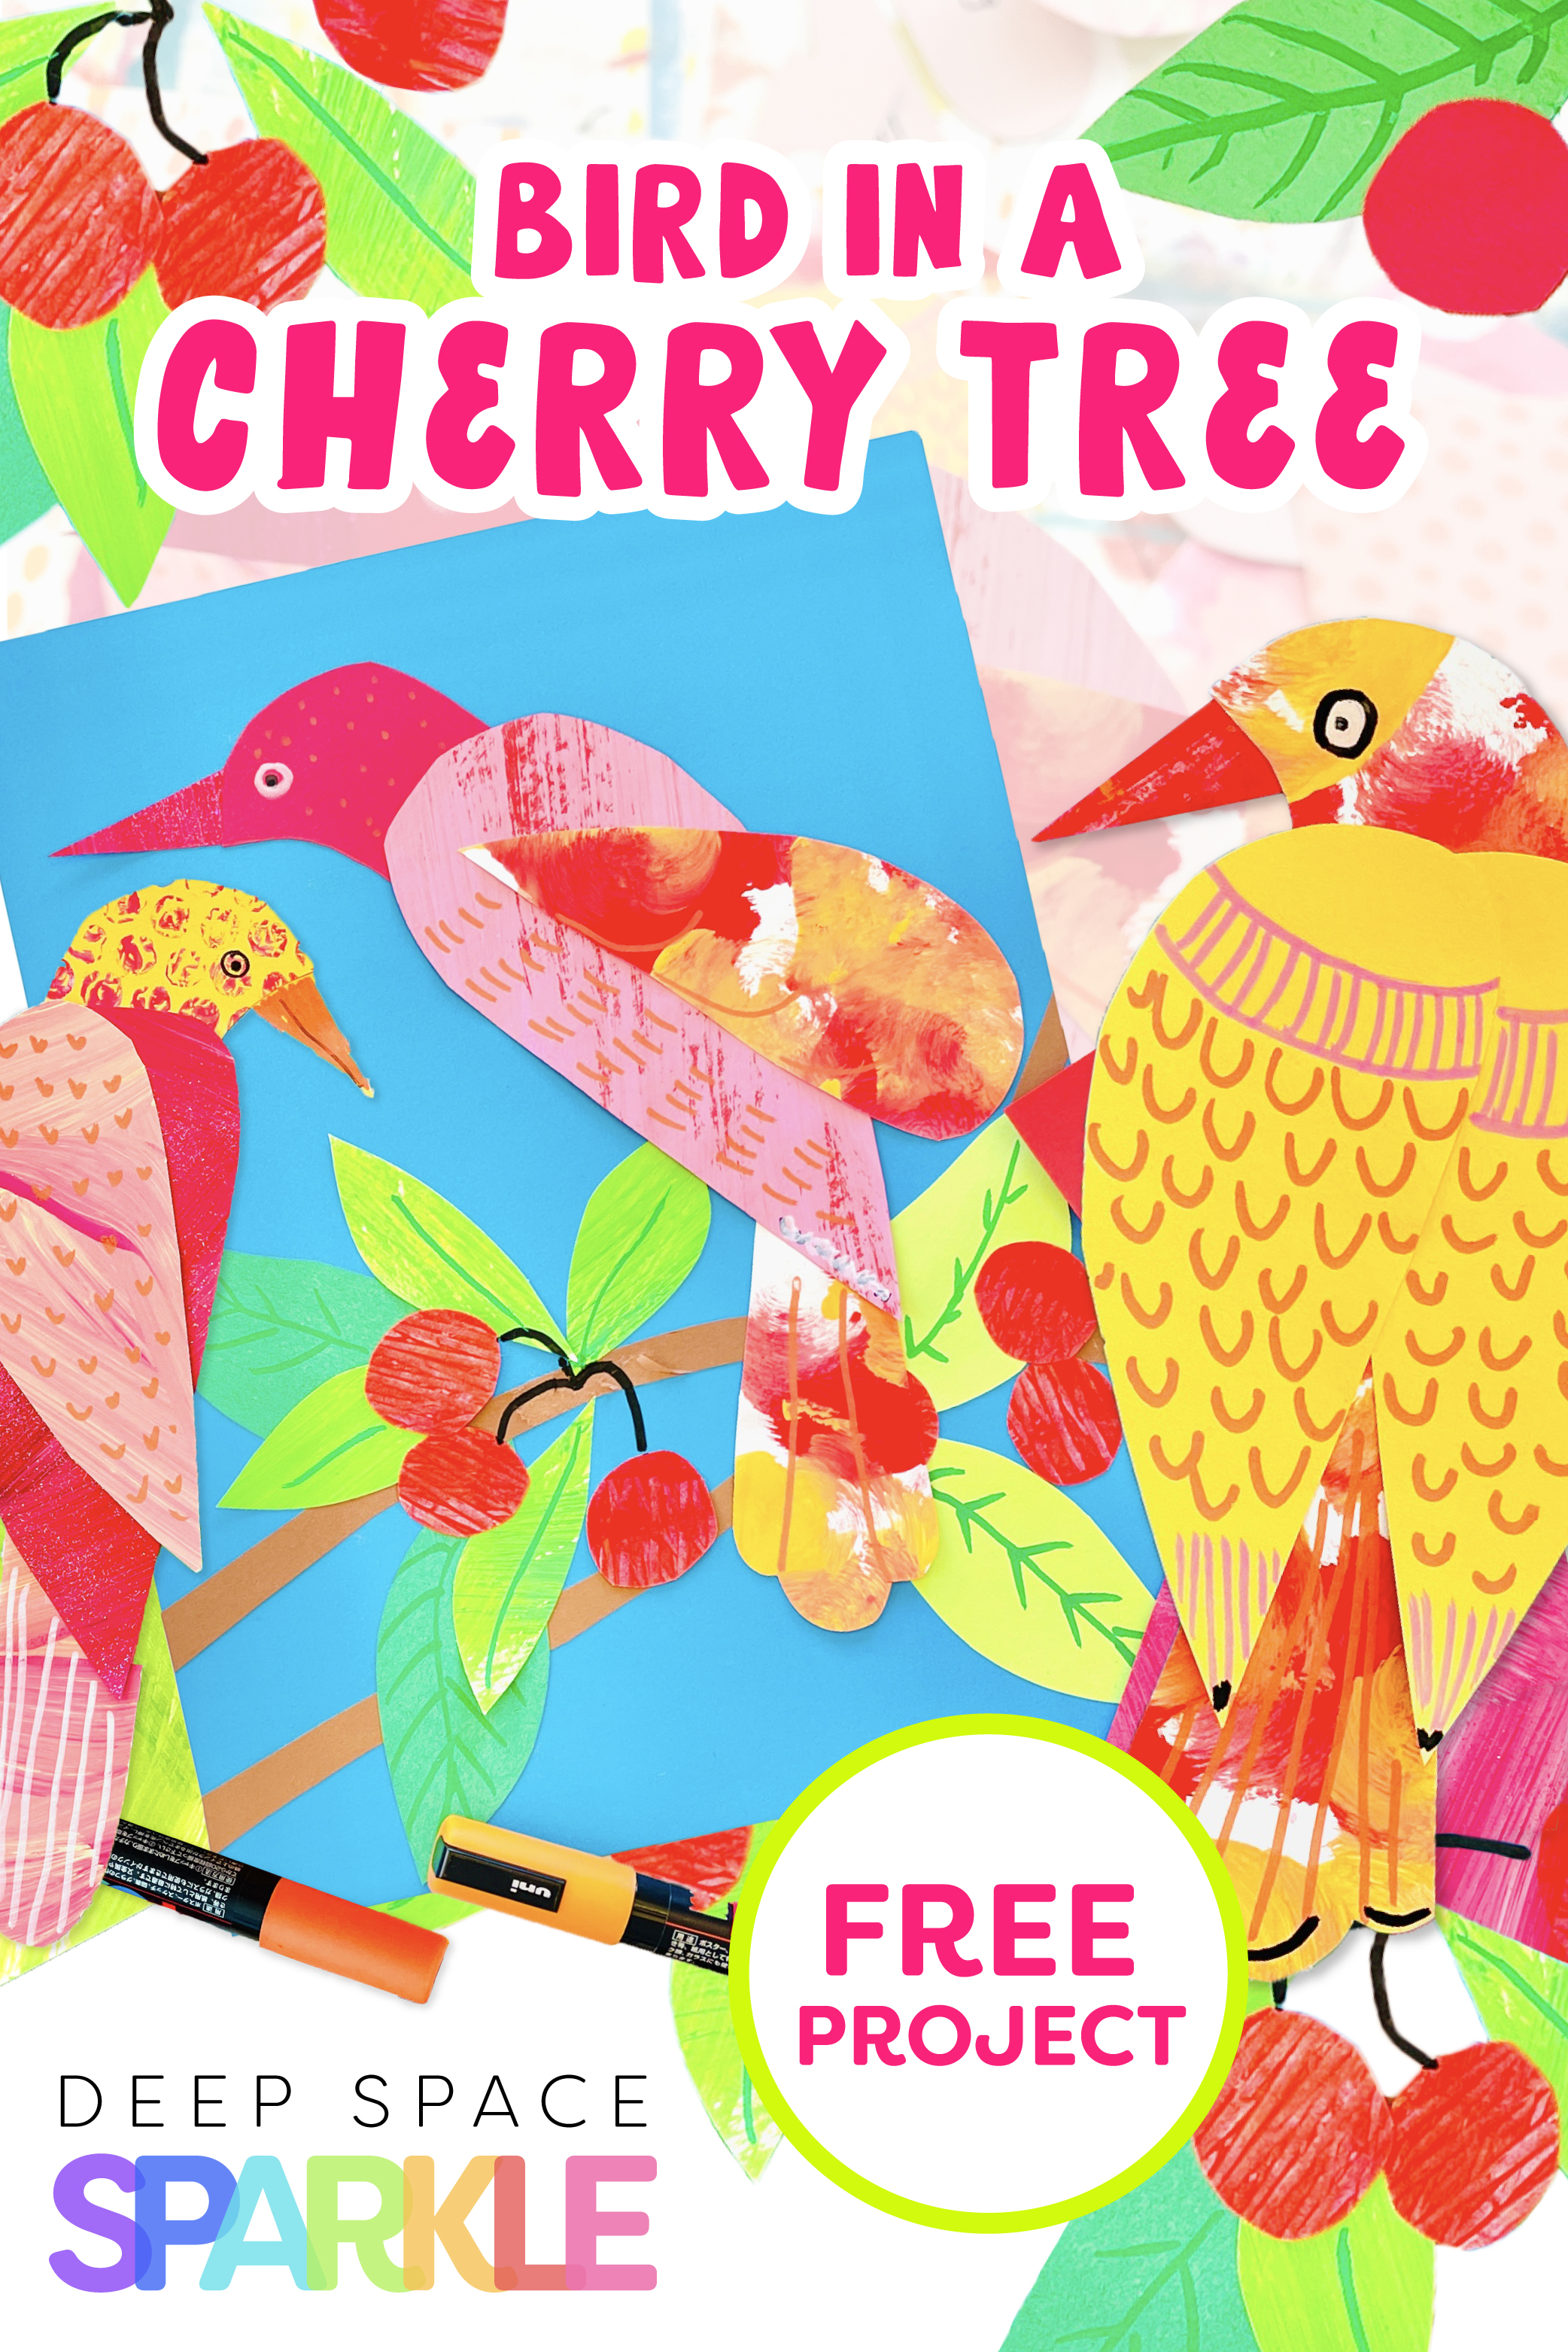
The project is based on the illustrations in Lois Ehlert's book, Pie in the Sky. It uses a plain or colored paper background with a bird created with bits of painted paper. See this post on how to make painted paper for your students.
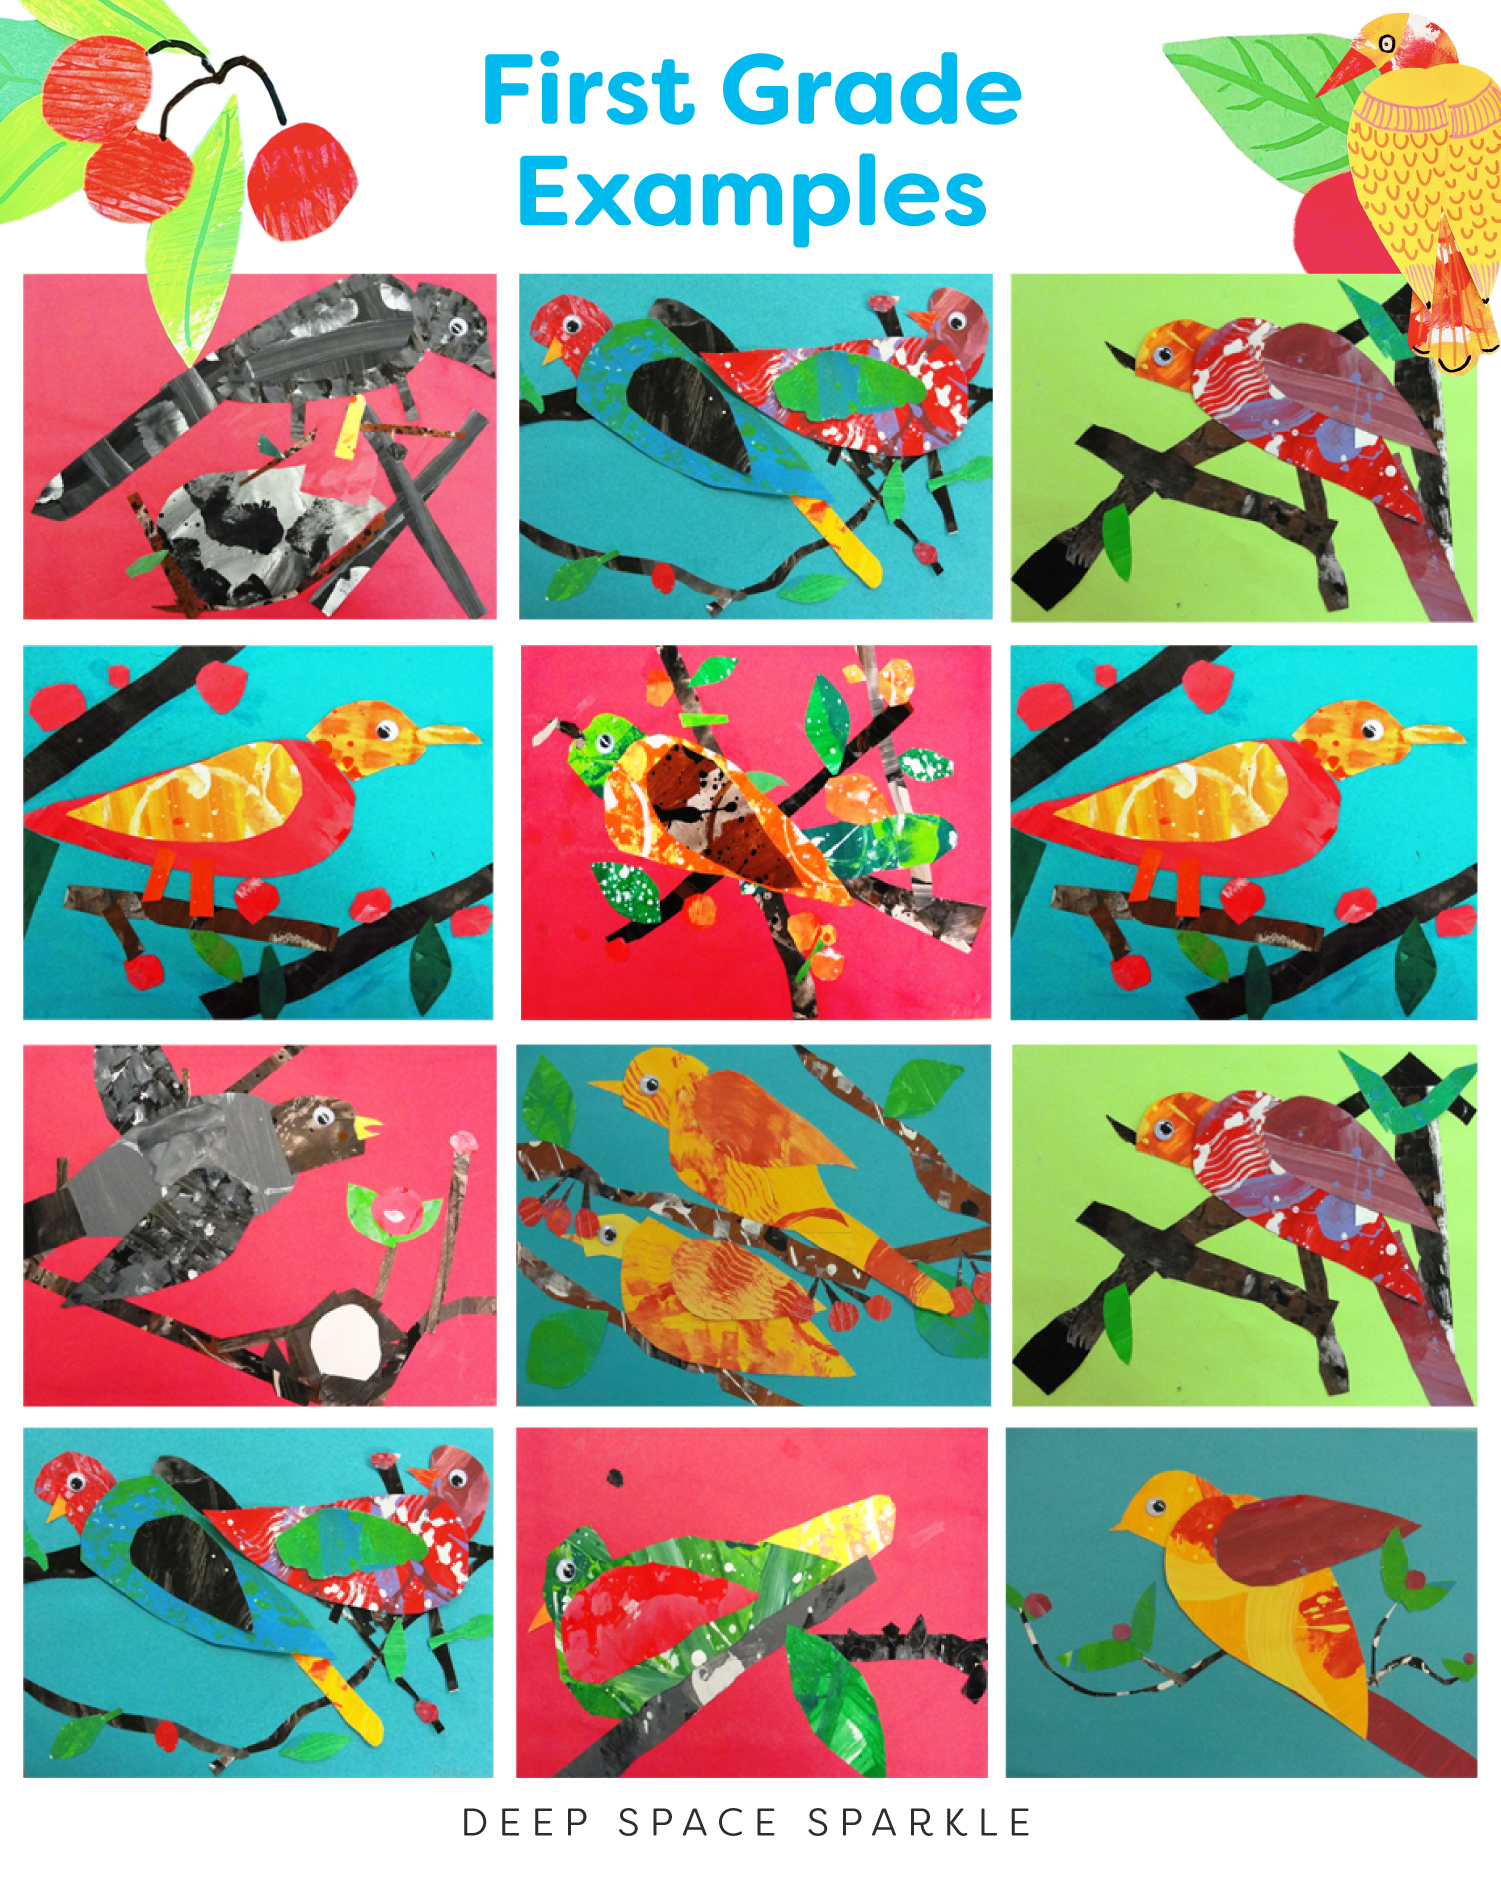
I used templates for the bird's head, body, tail and wings as this is a great way to set the pace of a class when you have a large number of children. If you're not a fan of templates, a nice compromise is to use the body template to establish a workable size for this project, then the children can add their own head and wings. Without the size standard, most children will draw a very tiny bird which makes the collage part really hard.
This is a project that's inside our membership, The Sparklers Club. The full lesson plan has templates, but you can easily make your own. Simply look at any image or photo of a bird and draw 4 sections: the head, body, tail and wing. Use cardstock or heavier weight paper to create a few templates for your students.
WHAT YOU'LL NEED:
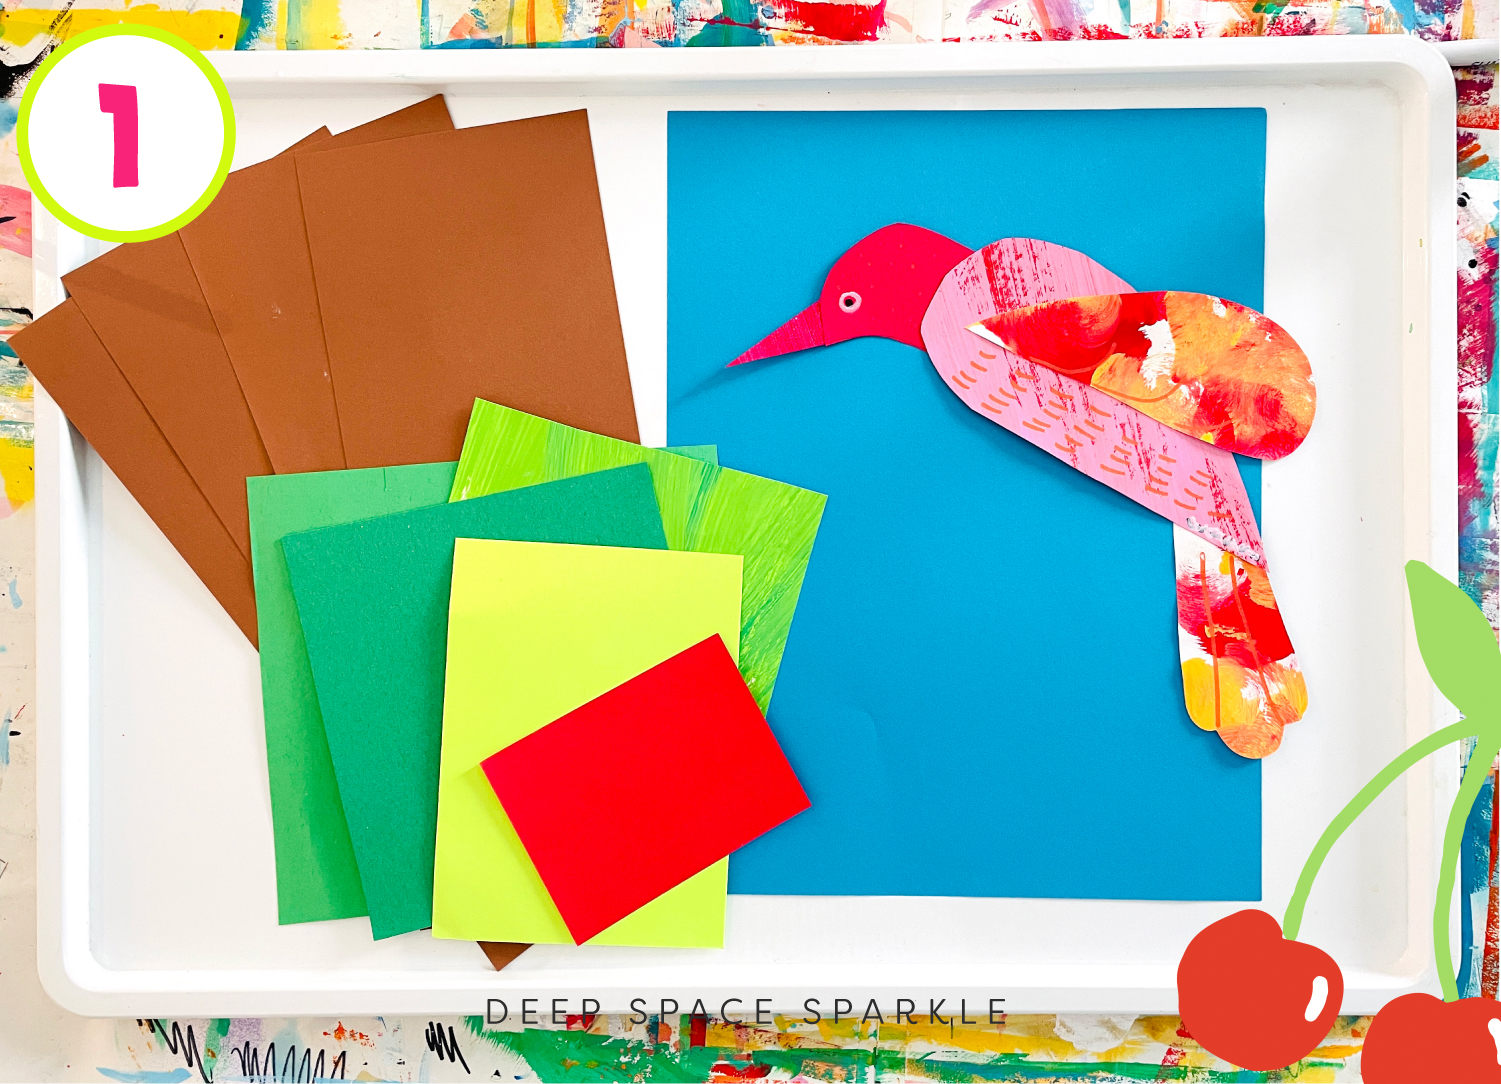
– Painted paper or colored paper scraps for bird
– 12″ x 9″ white colored paper for background
– Brown, green and red papers for branches, cherries and leaves
– Glue stick
– Scissors
– Pencil for tracing
– Paint markers or oil pastels
*Optional Paint Sprizers from Roylco
Creating the Bird
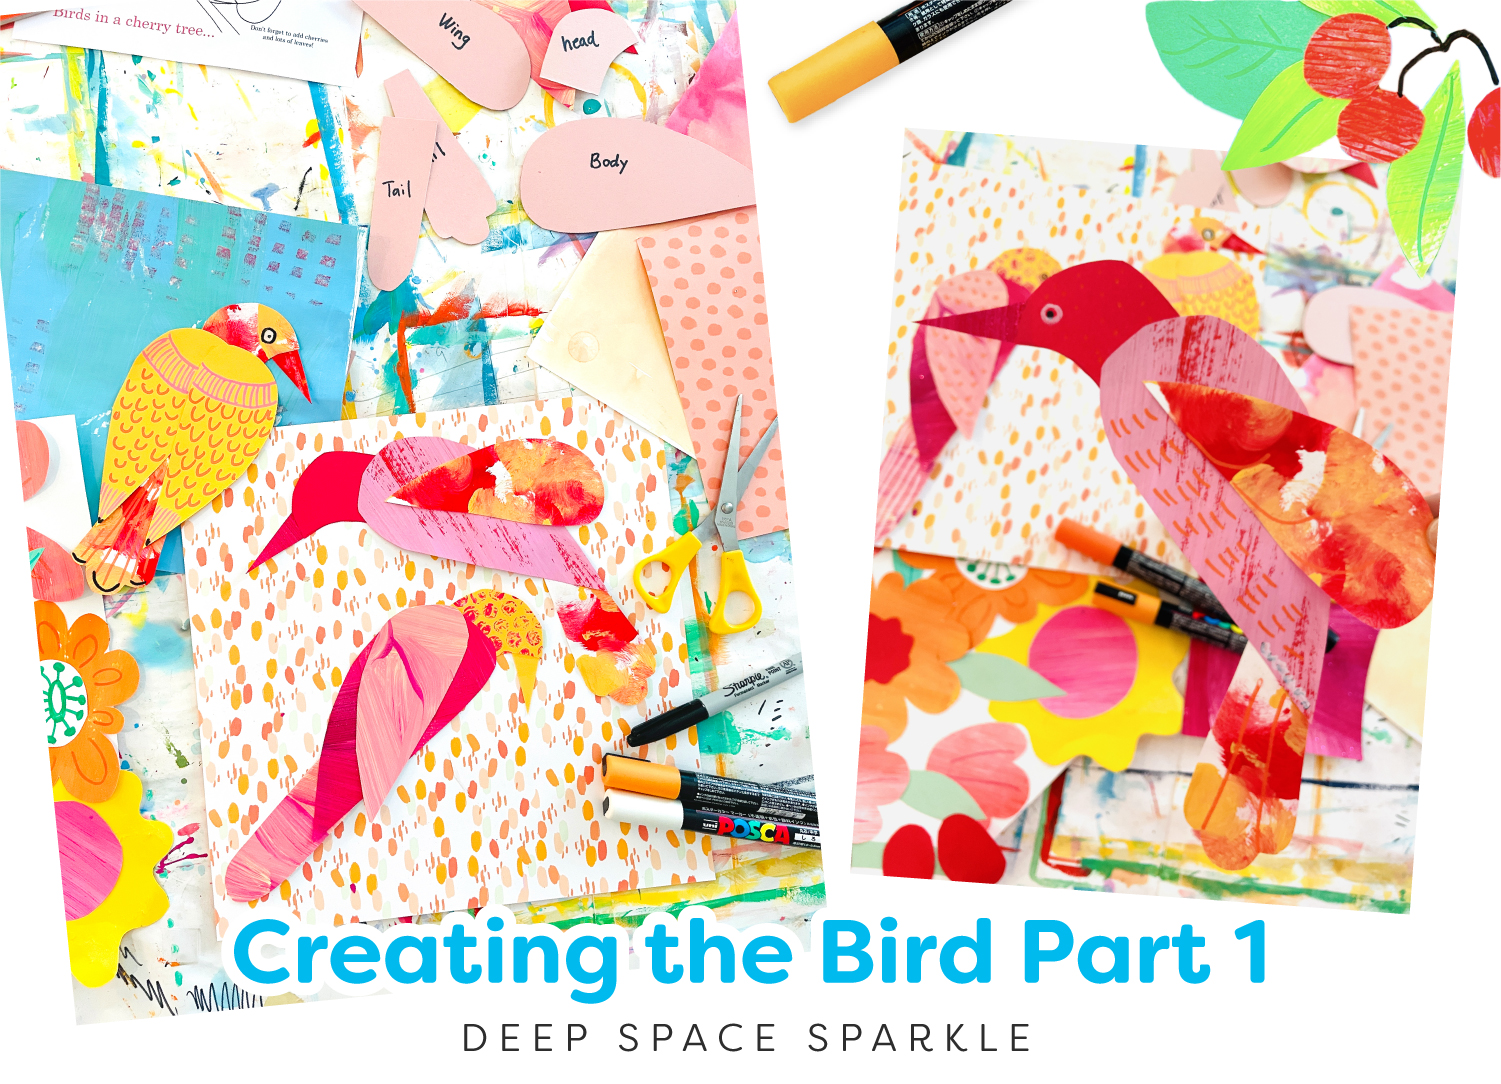
The bird uses bits of colored paper, painted paper and/or scrapbook patterned papers. Place a selection of like colored papers in a tray on each of your student's table and allow them to choose the paper for their bird's body, head, tail and wings. This is really a fun process for kids so prepare to sit back and enjoy this creative process.
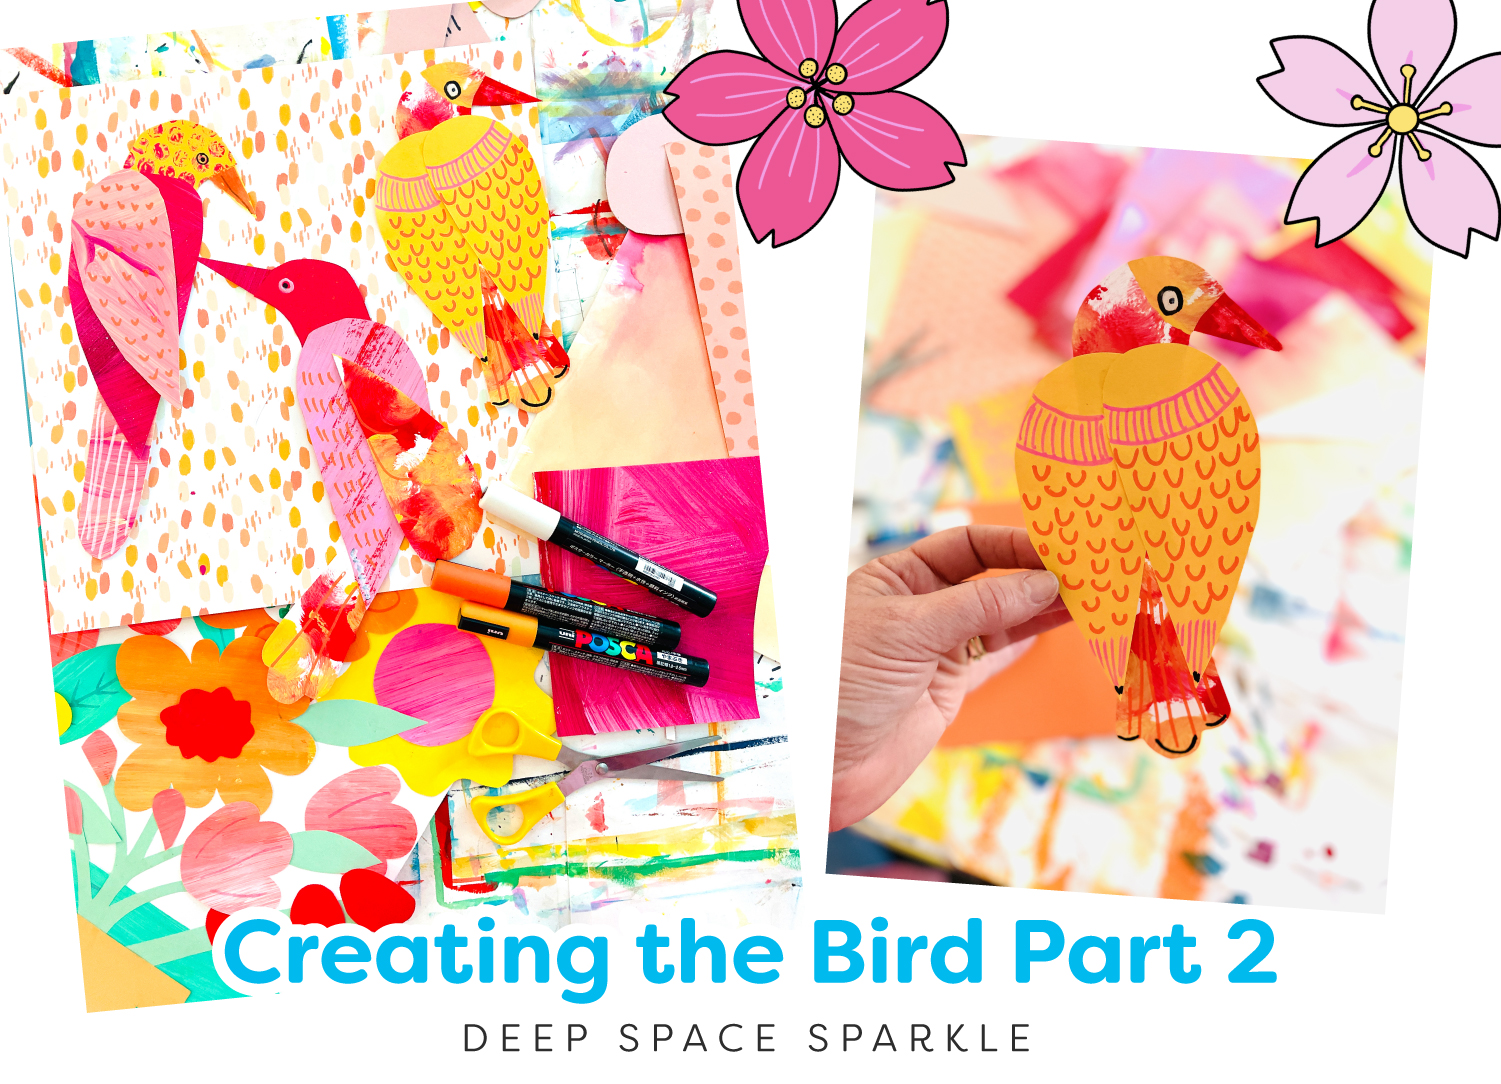
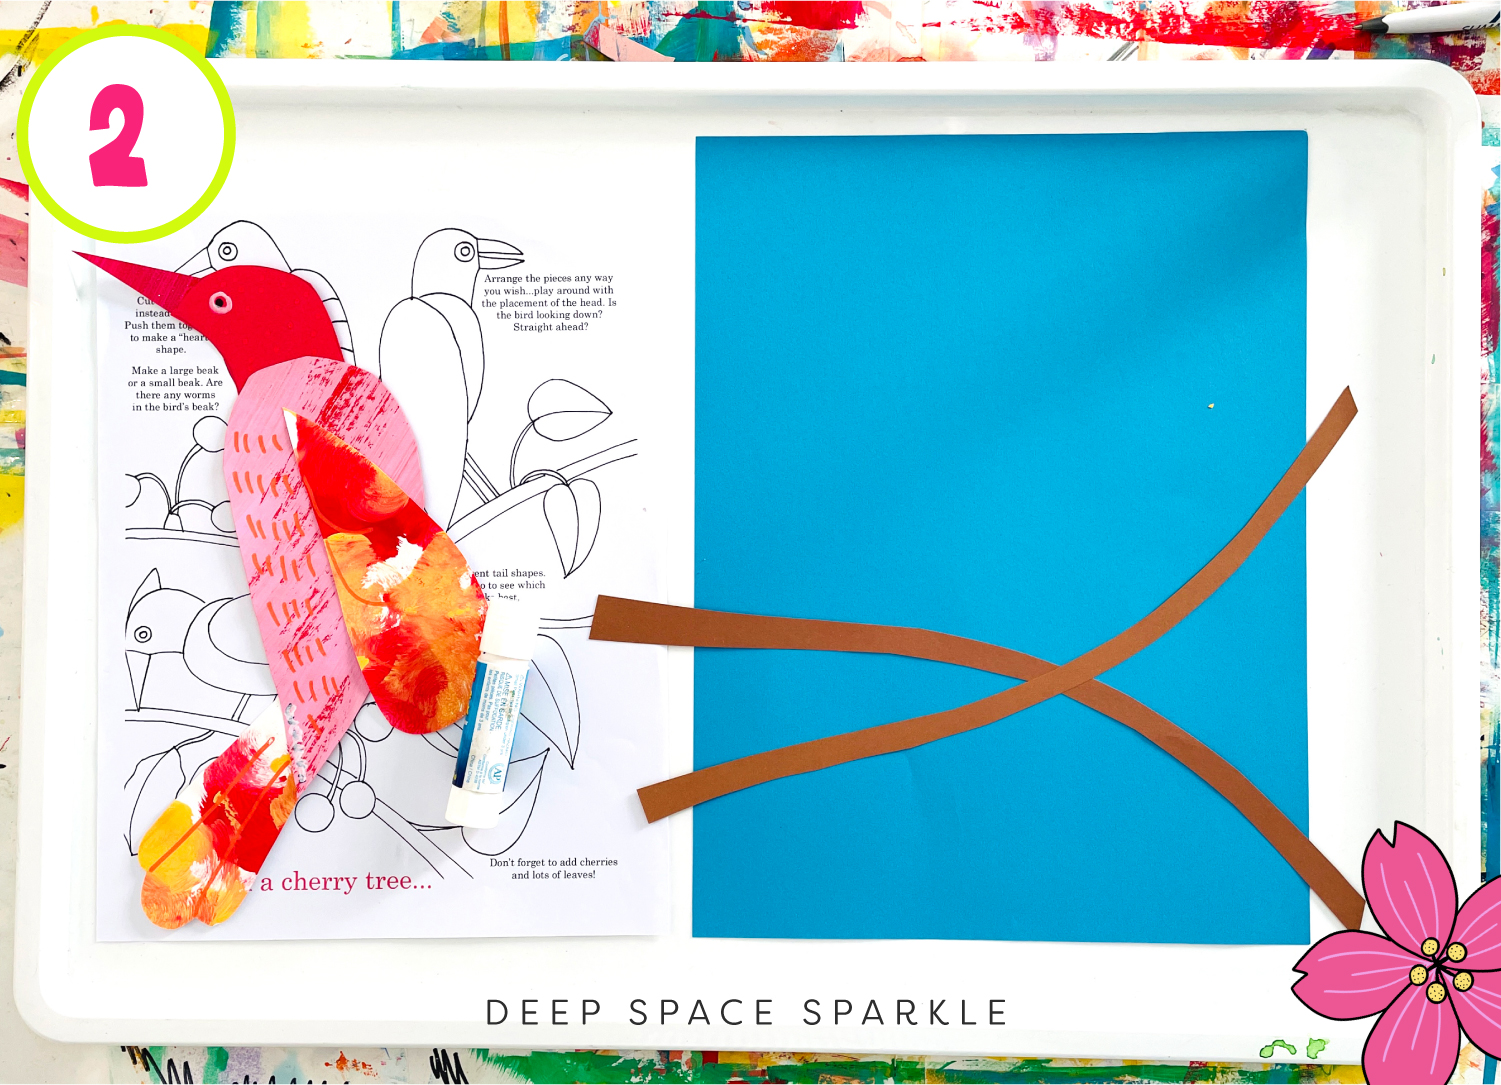
To assemble the bird, place the body on a work surface. Glue the head and wing on top of the body. Then the tail is glued under the body.
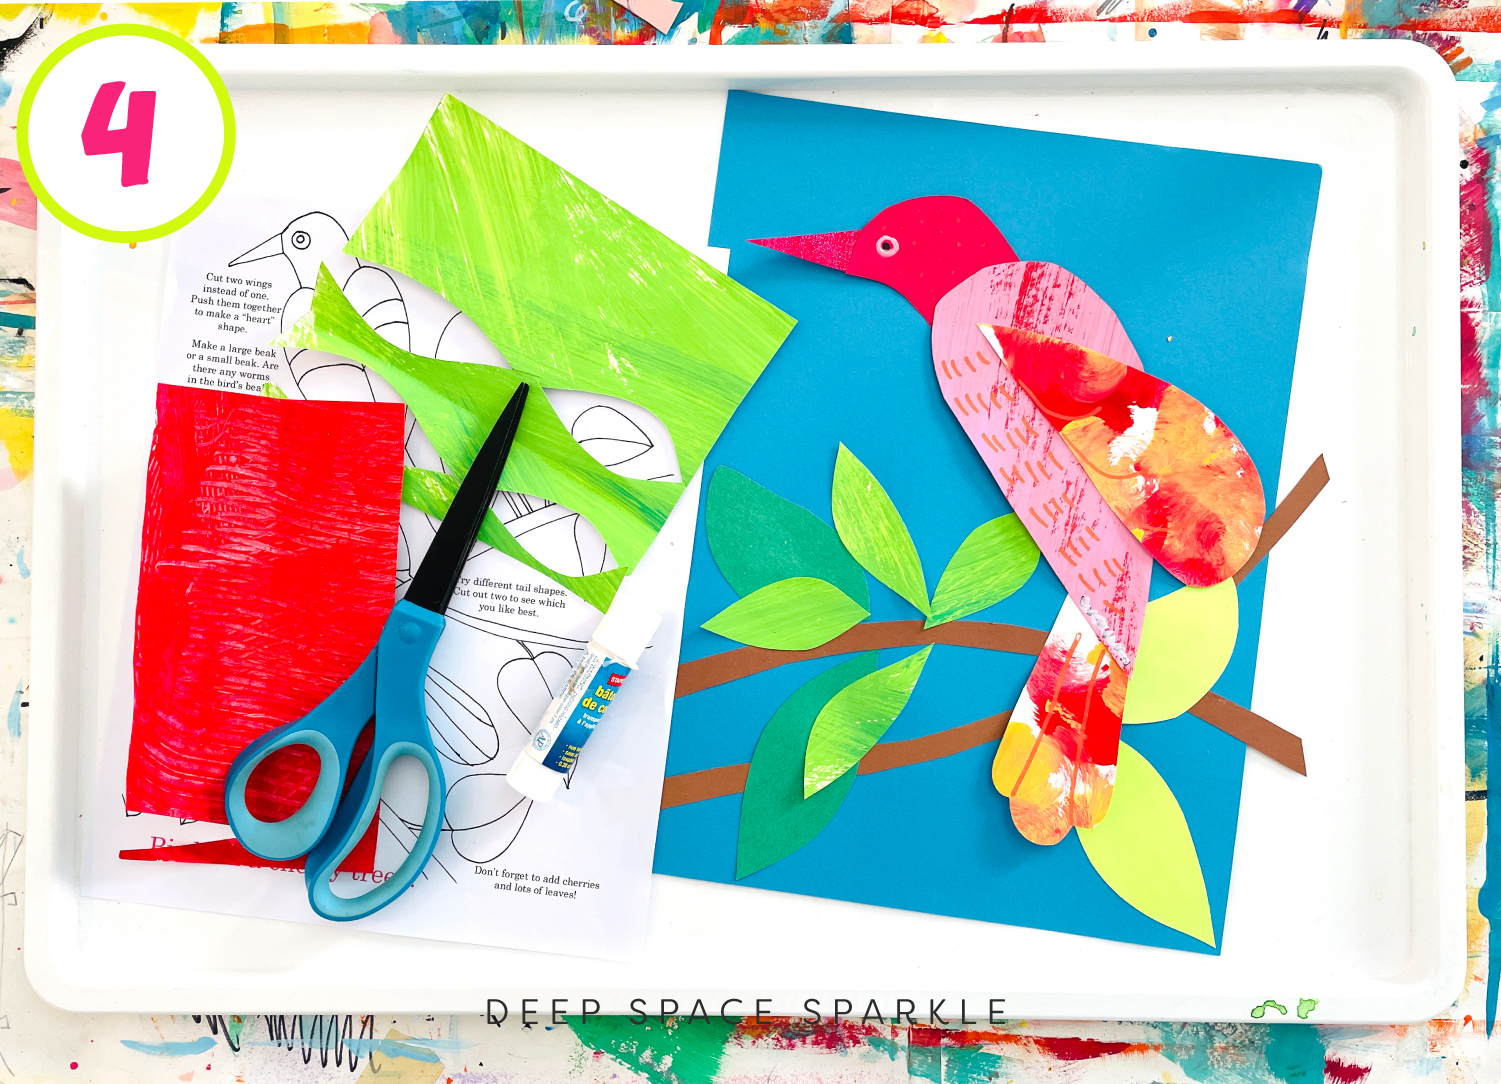
Use markers, construction paper crayons or if you have some paint markers to add patterns over top of the bird.
Set bird aside while students work on their background.
Creating the Background
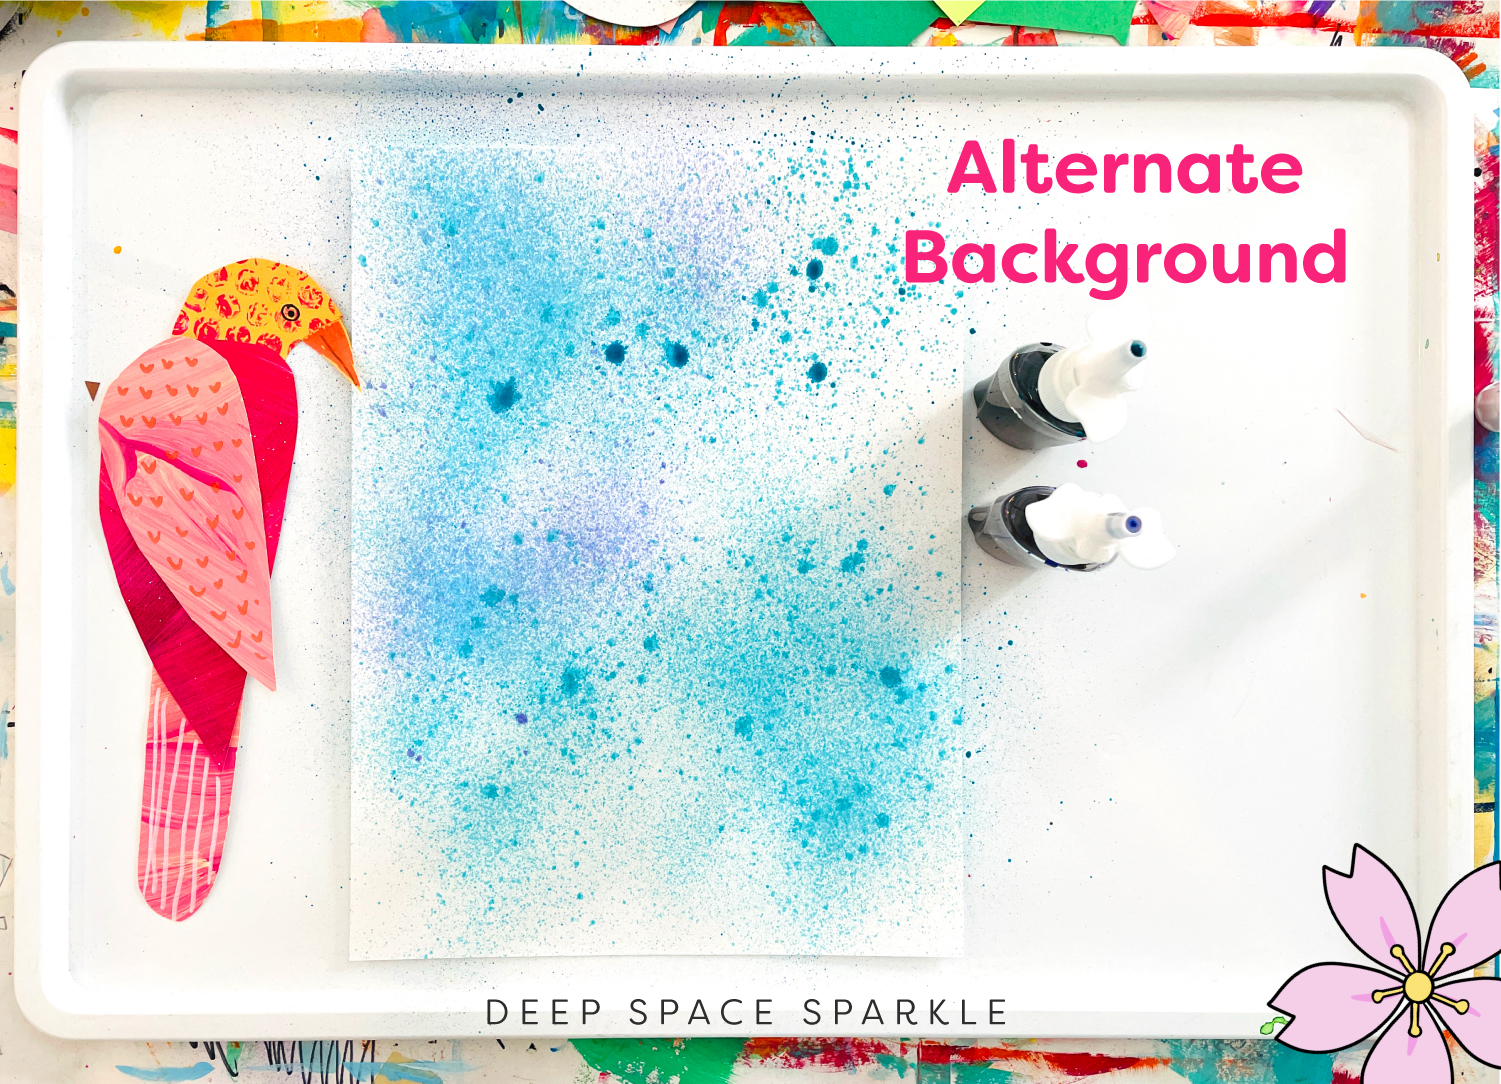
Select either a colored paper background or a white piece of paper. I received some Junior Paint Spritzers from Roylco and played around with spritzing my white paper with blue and purple liquid watercolors. I really love the effect and so will the kids. Only trick is to make sure the paper dries a bit before kids start working with it.
To make the branch, cut a slightly curved line along the length of the brown paper. Cut another line just below the cut line matching the curve. Add one or two of these branches to the background paper with a glue stick.
Gather a collection (3-4) pieces of small green papers and cut leaf shapes. Depending on your age group, take the time to show the kids how to fold the paper and cut one leaf shape in order to get a pair.
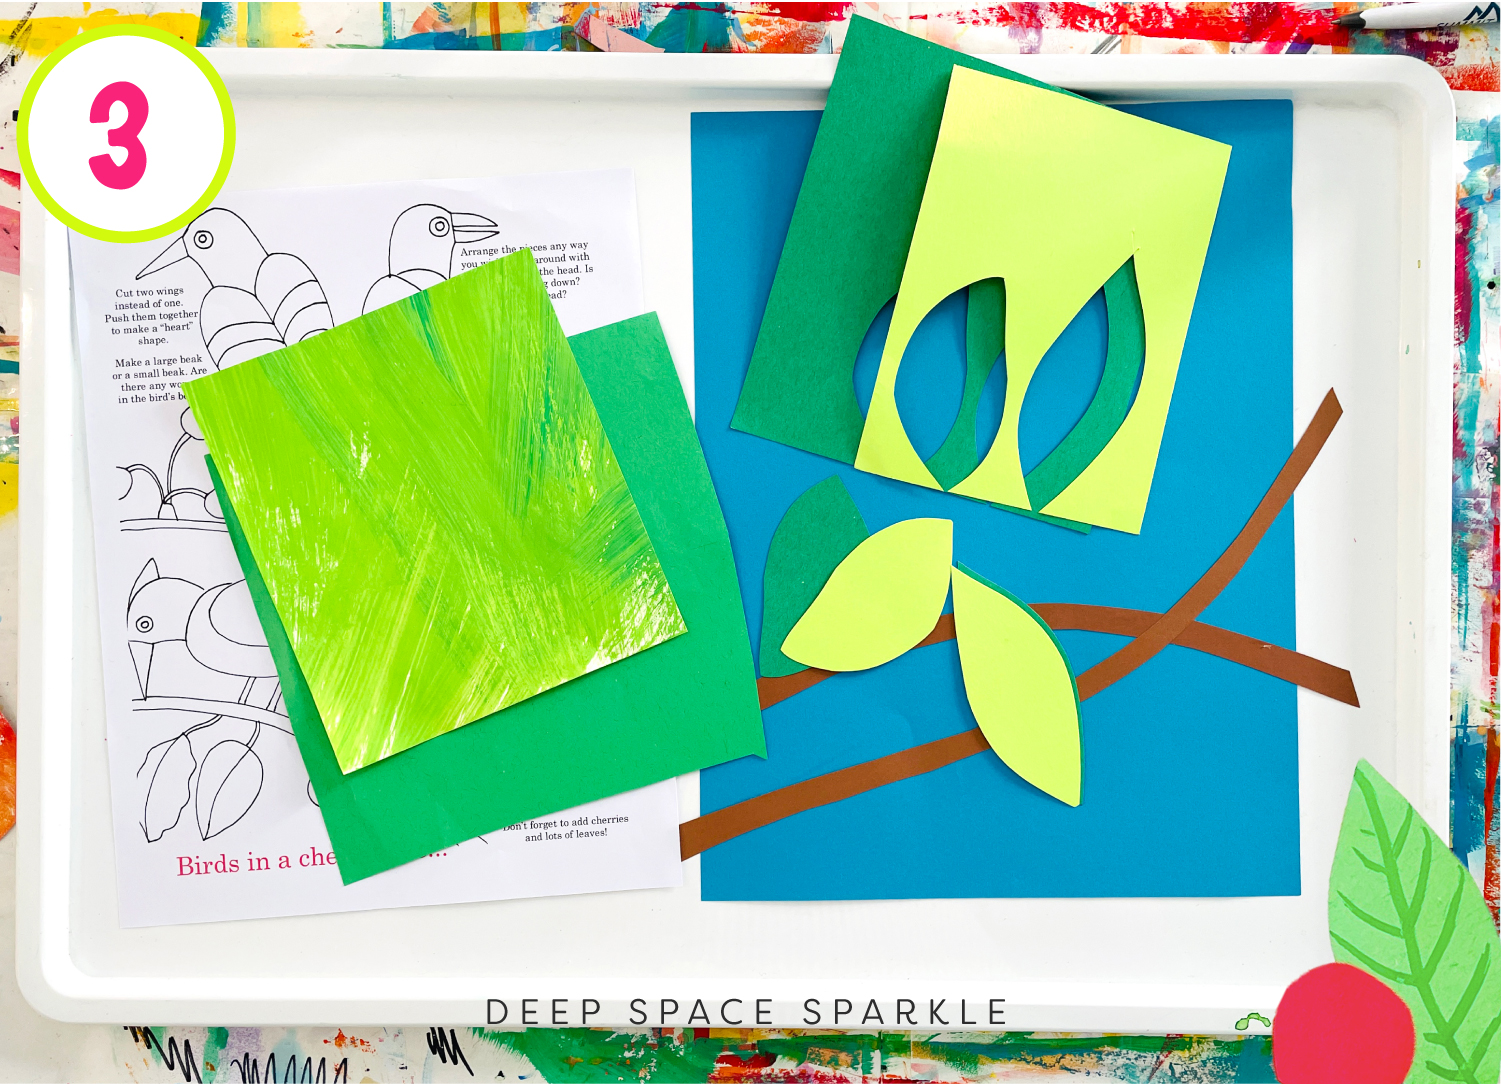
Glue leaves to branch. You may want to suggest that the kids point the tips together and fan out the leaves. Before cutting out the small cherries, glue the bird over the branch and leaves.
This project has been around for a very long time and I've seen many iterations of it over the years. Here's mine when I posted the lesson way back in 2010.
I'd love to see your versions or if you try this version, tag me on Instagram @deepspacesparkle.com
PIN ME!
Source: https://www.deepspacesparkle.com/bird-in-a-cherry-tree-art-project/
0 Response to "Drawing of Birds on Tree for Kids"
Post a Comment